Snazzy Signs for Fundraising – Part 1: Finding the Sale
By Katie Cordy
In this 3 part series, we will discuss the use of signs for fundraising: from guiding people to your fundraiser, to signs at your fundraiser, to labels and posters.
Part One: You’re Here!
Part Two: https://curiosityuntamed.com/snazzy-signs-for-fundraising-part-2
Part Three: https://curiosityuntamed.com/snazzy-signs-for…ndraising-part-3/
…
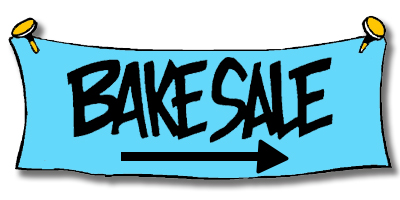
Have you ever driven by a sign for a yard sale that was crudely made out of cardboard, and hard to read? See a sign for a bake sale, but it was too late, and now you can’t get into the turn lane? Think you see a lemonade stand sign, but going in the opposite direction?
Here’s a secret to fundraising: no matter how awesome your fundraiser is, if people can’t find it, it won’t be effective.
Luckily for you, you don’t need a graphic design degree to make signs that will draw potential donors and customers in! Snow cone stand, bake sale, lemonade stand, yard sale…the guidelines below can help you create effective signage for all types of fundraisers!
Legality
In this regulated world, before you begin buying supplies for signs, you need to make sure that they are legal. Check your local city laws. Some cities and towns have no regulations, others may require a permit, some may have a limit on the number of signs, and they may even have all signs be illegal. Is there a size regulation? Can you attach balloons and pinwheels to them to catch attention? Are they only allowed on certain days of the week, or on during specific months? Can you place signs on your car if they aren’t allowed on the streets? As much as it is a chore, it is always better to double check your local laws than face a heavy fine.
Here is a previous blog post on the legality of fundraisers: https://curiosityuntamed.com/lawfully-fundraising/
Making a Sign Map
You want to make signs, but first you’ll need to figure out how many you’ll need. Here are some rules in regards to placing your gorgeous signs where they will be most effective:
- Check your local laws on when and where you are allowed to place signs
- Draw a map or use Google Maps. What are the main streets within one mile of your location? These are where your customers are going to come from.
- Mark on your map where your signs will need to go and which way their arrows need to point. Don’t forget that cars go in two directions!
- If there are long stretches, add signs with arrows going forward so that people don’t get lost.
- Make sure to include the location of your fundraiser. People like to know when they have arrived!
By creating a map, you can find out how many signs you need, and where the arrows on them need to point. Also, you do not have to do everything. By having a sign map, you can delegate to others the placement of the signs once they are made.
Design
You might have all the best locations picked out, but if your potential customers can’t read the signs, then this fundraiser has just gotten much more difficult. Never fear! Here are some tips and tricks to designing the most effective signs.
Materials
Make sure that your sign can stand up to your local weather. There are multiple designs you can do to fit your plans and weather best.
- Box Method: Take a cardboard box and place a few bricks or large stones inside of it. On the outside of the box, you can tape your sign securely. Choose neon paper to make your sign.
- Poster Board: Pick something around 20″ x 30″ inches. Best if in a neon color, but white will do.
- Corrugated Plastic: Easy to cut into the size you want with an Exacto knife! You can push metal rods down each plastic flute to stab into the ground and make your sign stand up.
When buying your materials, buy with the intent of making every sign look the same. That way, drivers simply have to follow the neon yellow signs. Pick a white or a neon color, and stick to that color.
In addition to your sign base, you will need:
- Black Paint or black large, fat markers, like Sharpie Magnums. Black contrasts well with neon colors, which is the first choice for signs. If you have white signs, then choose dark or primary red or blue to add a splash of color.
- Duck Tape or other materials to fix your signs to an object. Keep in mind that it may be illegal in your area to staple or tape your sign to stop signs, electrical poles, or other infrastructure.
Content
Here is the best graphic design advice you’ll ever need: Keep it simple. Too much text and images confuse the reader, and for a potential customer who’s driving, it doesn’t take much.
Grab your black paint or your fat marker and write in big, block letters that are at least 3-5″ inches. Keep the information minimal. People driving in cars don’t have time to read a lot of information. While some suggest placing the road name of the fundraiser, this can clutter the sign. Only do so if it is a well-known area, like a common park. Instead, trust your signs to guide customers where they need to go!
You may feel the need to decorate the signs, but these are not signs to look fancy. These are signs to spread information. In Part 2 of this series, we will discuss signs that you should absolutely go wild decorating!
Accessories
Depending on your local laws, you might be able to use balloons ribbons, or pinwheels to attract notice to your signs and help guide customers! Keep in mind, while you want people to notice your sign, you also don’t want to cause accidents. Be careful using this method on busy, dangerous roads.
Placing Your Signs
It may be illegal to stable or tape your sign to stop signs, electrical poles, and other infrastructure. Do not staple or nail trees. Check your local laws before placing your signs. You may need a permit. Remember, all the city has to do is follow the signs to give you a hefty fee!
On busy streets, especially those with turn lanes, place the sign approximately 30′ feet before the intersection to give people time to get ready to turn.
Don’t put your signs on peoples’ lawns without permission. That’s rude.
Don’t block other peoples’ signs, or traffic signs or other necessary infrastructure. Again, don’t be rude.
If you don’t mind early birds, place your signs the morning of your fundraiser, or after dark the night before. If you don’t like early birds or a rush right out the gate, then place your signs after you have set up.
During and After the Fundraiser
During the fundraiser, it may be worth having a volunteer go check that none of the signs have blown away or fallen over.
After the fundraiser, pick up your signs. Do not be one of those rude people who leaves their signs behind to rot or be picked up by someone else. Remember, you should a role model for your community.
Resources
Yard Sale Queen
A fantastic and amusing resource on all sorts of yard sale tips from a woman who admits she spends too much time yard selling.
- Tips: https://www.yardsalequeen.com/yardsale.htm
- Examples of Good vs. Bad Signs: https://www.yardsalequeen.com/yardsalesigns.htm
Best Garage Sale Tips – http://www.bestgaragesaletips.com/best-garage-sale-sign-tips.html
An excellent resources that breaks down where to place your signs and how they should be made in an easy way!
The Spruce – https://www.thespruce.com/advertising-a-yard-sale-1313853
Has tips for not only signage, but advertising on Craigslist and in your local newspaper.
Signs.com – https://www.signs.com/blog/5-signage-lessons-from-a-successful-yard-sale/
Five simple tips that can turn your signs from “meh” to “marvelous!”

2 Responses